Tuesday, October 27, 2015

Totally addicted to Mint!

The newest awesome toy from Silhouette is finally in my hands! This little thing could almost be mistaken for an Apple TV, it's so small. It's the Mint!
I had the pleasure of seeing this baby in action at the Silhouette Summit that I attended, and I was already in love. 
When the package arrived I was a little intimidated at first but just couldn't wait to try this thing out, and an hour later I already had a stamp made! I am super excited about this machine because this means that we are so much closer to having a BIG thermal imaging printer for stencil making and whatever else you can think of! All of this technology touches on the same idea that GOCCO machines use, using heat to burn an image into thermal media. So in essence, this little contraption could be a future self contained screen printing machine. (fingers crossed)

Anyway, I wanted to make something fast, for the holidays and personalized. So I threw together this little stamp that I will use on my Christmas gifts:
And loaded up my new Mint software, which was surprisingly painless, as was the entire stamp making process! Its was so ridiculously easy, here were the steps:
1. Open your design
2. Choose stamp size
3. Center image
4. Choose filter (if needed, I think you might only really need these if you're trying to use a photo)
5. Click "Start Mint" ***Before putting in stamp***
6. Put in stamp cartridge 
TRA-LA! Thats all there is to it, the entire process took about 10 minutes, on my first try! Here are the results: 
Here is the stamp fresh out of the Mint and mounted on its block:
Waiting for the ink to absorb,
And stamping to get all the excess ink off. You can see the detail that this little machine can achieve, The only reason my stamp looks a little "messy" is because I added grungy textures to it so it wouldn't be too perfect.
Look how cute it is on my little Gift Card Bag!
I can't wait to make more stamps, my head is already filled with ideas! The possibilities are endless, you can use photos, which is something that the Silhouette definitely cannot do. It opens up so many more ways for you to personalize something, and FAST. I highly recommend grabbing one of these,  especially if you already an avid Silhouette-er. Has anyone else had success stories with this little toy yet? I would love to see what others come up with. :) Happy stamping! 
xoxo

Monday, July 27, 2015

So many new designs!

There are lots of fun new items up in my store today, check them out! :)


xoxo
-Soph

Thursday, July 2, 2015

Perfect Gold Foil! Minc Vs. Laminator

If you know me, you'll know that I can be a little obsessive. I have been wanting to start foiling for a while now and I was torn about whether or not I should buy Heidi Swapp's Minc machine, or go with a "cheaper" lamination machine, which supposedly works just as well. After lots of video watching I decided to try to save some money.
I am already used to messing around with toner from working with my Gocco. I think people should know that it's not exactly easy to just find a copier that uses toner these days. I know that my local copy place does not use toner anymore, just FYI. For me buying a laser printer is a no brainer because I will be using it for multiple things. I actually had an old one is storage but the ink is no longer made, so I decided to upgrade to a Brother laser printer.
I started out ordering a Swingline laminator, and the results were not great. Anything that is worth showing for this test was laminated after I let the thing heat up for at least an hour. It still definitely worked, I just wanted it to be perfect, the black spots sticking out really bugged me. 
Why aren't you solid???
It seemed like there was a lot of room for error, and I couldn't help obsessing over pinterest pictures where the gold foil was perfect. Running it through the laminator 3-4 times, waiting that long for it to heat up all for mediocre results just wasn't good enough, and it looked like all laminators pretty much worked the same, unless they were expensive. After watching lots of Youtube videos, I decided to run out and buy a Minc machine, and after seeing that there were a couple at my local Joanns. And guess what, it was on clearance for $89.99!
Since the Minc came with some sample foil, I was able to test my results with both the Minc foil, and the art deco foil. Overall I think both foils are pretty much the same in terms of quality. It seems like the red has better coverage than the blue for some reason, the red was able to adhere much more while the blue had a good amount of problems.
Using the Swingline, after letting it heat up for an hour.
 The red looks all right, but...
The trouble with the blue really stood out for me.
 They're still cute, just not perfect.
 Another using Kraft paper and the Laminator. I just can't stand the spots. 

And here is the first attempt with the Minc! Not bad fpr a first try.
 Results with Minc, same foil and paper.
Still one tiny flaw, not sure why, but looks way smoother! This was on setting 3, I think if you're using card stock, just go ahead and go up to 5.
After only spending 10 minutes with the Minc, it was clear who the winner was. The Minc had results that were infinitely superior to what the laminator could do. I tried making a few pages for my planner (planner accessories coming soon!), and wanted to try a bunch of different papers besides plain white. I was most excited to try to foil kraft paper, in my head it looked so neat.
Success!! It came out perfectly, with minimal effort! No waiting for it to heat up for hours, no sending it through multiple times.
 Look how pretty the red is!
 From my coral collection :)
So pretty!
I am just amazed at how different the results are from the laminator, the pictures really don't do it justice.
Considering the Laminator was around $30 (which is getting returned), I feel like the Minc is worth the extra money. The time and foil that will be saved from eliminating errors with the Minc is definitely worth it, especially if you want to make high volumes of prints, like I want to do. It was also nice that some foil came with the Minc so that I could test it out without buying more products.

Tips/Verdict:

Use the smoothest paper you can find
Make sure your settings on your printer output the most toner possible (highest dpi/quality)
Minc: Worth it
"Cheap" Laminator: Worth it if you're not a perfectionist
Art Deco Foil: just as good as Heidi Swapp foil
Minc Foil: Wonderful!

Here is my list of materials:
White Paper
Kraft paper (on sale for super cheap at Michaels right now):

Black paper
Deco Foil 
and the winner: MINC
If you want to make any of my posters with foil, you can buy them from my shop in high resolution:
Peacock Feather Poster
 My peacock Feather design came from my Silhouette store
The Wild & Free Poster 
The Coral print design was used from my coral collection here

But since I'm sure y'all would like to try this without buying MORE stuff, I'm posting my designs that I used for the coral print and the Wild & Free print, the size of the artwork is about 2 x 2', perfect for a small print, and you can get 2 on one 8.5 x 11 page.


Print them out in black, and foil them up! Have fun! Hope this helps with some decision making. :)

Monday, June 29, 2015

Dots on everything!

I have been obsessed with dalmatian spots recently, I want to put them on everything! I realized that it would be super easy with my Silhouette machine and some stencil sheets I had laying around that I ordered from Amazon-
 Stencil Sheets 
Dalmatian Spots Stencil
I opened up my pattern and sent it through the Silhouette with the same settings as heavy card stock. 

It cut out perfectly! I wanted to make sure it would work, so I dug out some black paper, paint, and some stencil brushes.


Look how cleanly it came out!


I started blotting the spots after taping down the stencil and paper,


It looks great!!
I just love the texture that came out with the stencil brushes. Just imagine how cute this would be on fabric, or a onesie, or with some gold foil! The possibilities are endless! I am currently trying to figure out how I would make curtains with this stencil. 


I hope you love it and that y'all come up with some great ideas! :) And if anyone would like a pre-made printable poster using this pattern, you can use the one that's on my Etsy shop!

Have fun! :)

Tuesday, June 16, 2015

Another Etsy Store!

There are too many things swirling around in my head!! I have just been going crazy creating stuff lately, so I decided to open up another shop to go along with Sophie's Paper House. I wanted to start making printable art and typography, so here is  Sophie's Pixel House!
Gallery walls are so trendy these days, and with my art you can set one up cheap and easily. Don't spend a ton of money when you can do it yourself, and it's way more fun!

https://www.etsy.com/listing/237183389/ampersand-printable-typography-art?ref=shop_home_active_17


Wednesday, June 3, 2015

New 3D stuffs in my Silhouette Store

Finally getting around to putting these projects up in my store, I've been wanting to make these forever! Hope y'all enjoy!


Tuesday, June 2, 2015

Etsy Etsy Etsy!

 My Etsy Shop is up and running once again! I have updated it with a bunch of my own svg files for people with die cutting machines, and paper addictions like me. These can be used with paper, vinyl, fabric, the possibilities are literally endless! Check it out and happy crafting! :)
 

Thursday, March 26, 2015

DIY Wedding Invitations

I thought that making my business card was one of the most labor intensive things I had ever created. My wedding invites blew that right out of the bucket.
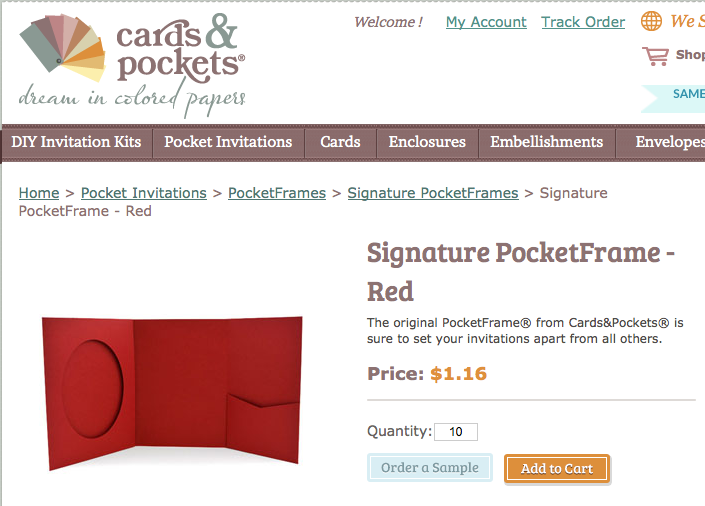
I knew that I wanted to incorporate die cut elements, as an homage to my work with Silhouette. I ordered samples of paper from cardsandpockets.com. I chose them because they had the most unique templates that I could find to use as my base. I decided to go with this style:
--
I also ordered a swatch book to help me decide on the other colors I needed, white, black, and gold. Here is my little buddy helping me pick the colors.
I used the measurements from the pocketframe card and started die cutting my "white gold" paper, at this point I would literally have both of my Silhouette machines going at the same time, this was the most tedious step.
Once I got all the pieces all cut out, I started to Gocco my gold designs onto the papers. I am so obsessed with my Gocco machines it's not even funny, I would do anything to figure out a way to revive this dead art.
This is my setup: I had to find that HP printer in the background especially for Gocco-ing. That printer is one of the few that prints with carbon ink, which barely exists anymore. Every once in a while you will see some old carbon ink cartridges pop up on ebay, and those are usually snatched up by me :)
I couldn't really take pics of the printing process bc once you get going you really shouldn't stop. Here are some finished cards hanging up-
 running out of space!
Meanwhile, I was agonizing about my die cut portion of the invitation. This is how it finally came out after SO MUCH trial and error that I was beginning to think it couldn't be done!
Then I got the envelopes back from the calligrapher! I wish I had the talent to be able to write like that, my handwriting is so terrible that I might as well be a doctor.
Just a few more steps to go! I ordered both the round and square gold double mat straight from Cards & Pockets, so that saved me some steps. I sent the white paper through my Silhouette to get that double rounded edge on all the cards. I also ordered the envelope liners straight from Cards & Pockets as well, which saved a ton of time and energy.
Laying everything out to see how well everything is fitting together so far.
At this point I had Gocco-ed both my gold background and the text on most of the cards.
Organizing stamps. I went a little cray.  But seriously how cute are those vintage stamps?!
 Now came the finishing touches, like adding wax seals and lace to tie the whole card together. I had a ton of antique french lace laying around from my mom, so I finally got to use it for something!
The lace ending up matching with my bouquets. :)

 All addressed and ready to go!
The first round, all ready to be mailed out! I had to have them hand cancelled at the post office, I don't think I have ever had a harder time leaving something behind before. Trusting the USPS with this was terrifying!!
 But despite my worrying they arrived, and made their way around social media! :)

All finished!! Has anyone else ever attempted something like this before? Please tell me I am not the only crazy one, haha...
Hope this inspires you! :)
xoxo, Soph