Ever since I started using the Silhouette, trying to use paper efficiently and get the settings just right have been a challenge. I wanted to create a project that I could fit entirely on an 8.5 x 11 and be a neat package once all cut out. Then I discovered how awesome the pens are and I went a little wild. I decided to create my first ever tutorial, and dedicate it to Valentines day!
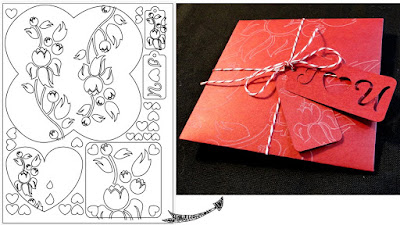 I discovered the beauty of using layers in Illustrator to create one layer of pen art and one layer for the cuts. The best part about using layers is that you can essentially create an entire project on one single document, or piece of paper. I love the look of petal envelopes, so I decided to include that as a holder for all the pieces of the puzzle.
I created my template in Illustrator with 3 layers: One is locked on top with registration marks. This makes sure that the CraftRobo software doesn't re-position my work. The 2nd layer is the pen art, and I do this part first so that the ink can dry before the cutting.
Since the only way I really use the machine is through Illustrator with the CraftRobo plug-in, I am going to assume that you already know how to do this. If you don't use this method it is not hard to set up, and there are tons of tutorials out there that can help you. I am including my Illustrator file at the end of the post.
Here is the Template all together: one petal envelope, 2 note cards to choose from to go inside, and 2 tags to choose from for decoration. Oh yeah, and some heart confetti, because why not? ( I hate wasting paper! It's kind of an OCD thing)
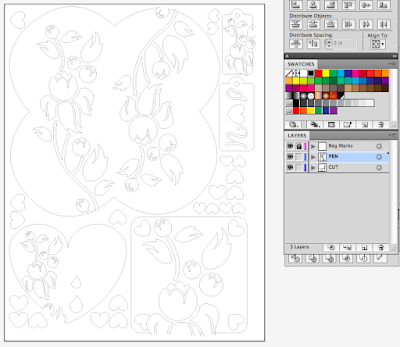
So for the first step, select your paper. The kind I am using is 65 lb card stock. Load it onto your mat and into the machine, lining the top left corner of your paper on the zero on your mat. Load your pen into the machine, make sure the "Cut" layer is turned off in AI, and put in your settings. I put my pen pressure settings at 25, but I think it could probably handle more. I also put my speed at 1, the slowest so that the ink would have time to dry without being touched by the rollers and smeared.

File layers:
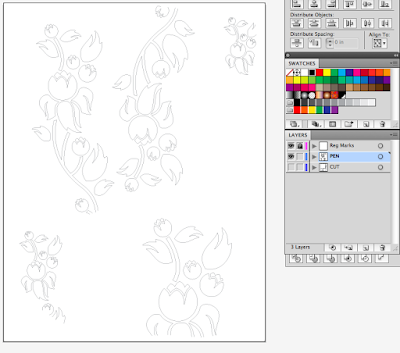
Hopefully this is what you will get. I also leave the cover open when I use the pen because it looks like it wouldn't fit if it were closed.

So with that done, go back to Illustrator and turn off the "Pen" layer and turn on the "Cut" layer.
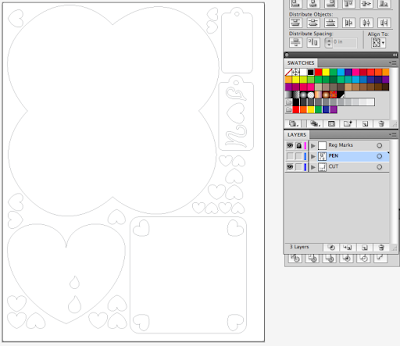
You can theoretically leave them all on and have the machine pause between layers, but I just do this to be safe. These are the settings I used for the cutting:
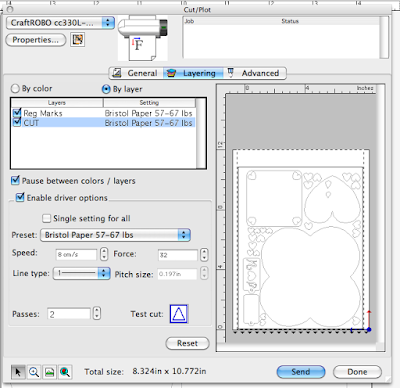
If all goes as planned, everything should be lined up and cut out on your mat. Of course, it will probably take you a few tries to get it right with your paper, I know it took me a few times to get it cut. It helps to have some paper that you don't really like for scraps to test, but is the same weight as what you intend to use. One thing I think is very important is having thick books on each side when using thick paper, because without that support sometimes the mat bobs around and some pieces can come loose.

Also you might want to figure out exactly what settings to use before you make a ton of art using your pens. Here are all the pieces all weeded out:

Now the fun part, putting it all together!

It is much easier to fold the petal envelope once you have scored it. You can use a bone fold or a special scoring tool, I love mine.

You can choose which side you want your art to go on, I chose the outside since so much will be going on inside.

And Tra-La! Here is it all put together:

And what can come out when it is opened.

There you have it! Personalize it just for that special someone. And they'll think that you slaved away on this for days! :) I wrapped mine up with baker's twine, which seems to look good on everything lately. It's the craft world's mascara.

After that you're pretty much on your own! You can include one of the note cards, both, or whatever you want! Also, when you print out multiple sheets of the template with different colors of paper, you can substitute some of the pieces, like I did with the confetti. If you are savvy with AI, you can use modify the template to your heart's content. See what I did there? I hope you all enjoy my first Silhouette tutorial, and feel free to use my free template, just make sure to please site my blog you do! :)
And don't hesitate to show me what you come up with!
Download Sophie's Valentine Template
(I saved it as version 9 in Illustrator)


