Tuesday, November 20, 2018

Thanksgiving Pumpkin Photo Display Tutorial!

Hey everyone! Very last minute, but you know that's how we do around here :) Here is a quick tutorial on how to put together my Thanksgiving Pumpkin Photo Frame! 
Here is the finished version-

So to start, when you cut out the pieces, there will be a large piece that looks like this-
simply fold all of the tabs into each other, and tape (or glue) the frame together, like this-
I like to use double sided tape for this bc it's strong, cheap, and I have a lot of it. Next we cut out the other pieces-

Cut out all the pieces you want with corresponding colored papers, and find your photo or whatever you would like to put inside.

Now you can start to assemble it the way you want, add other designs or just go crazy! I love my scotch dot glue pen for the little pieces, it works perfectly.
Here you go! This is how it looks lying down. I included 2 pumpkins in the file, one for if you want your frame to stand up straight, or the other for if you would like a rounder bottom pumpkin, and for the frame to rest on your surface. Have fun and happy gobbler day!


Monday, April 2, 2018

Easter Craft Fair

First Craft Fair Ever!


It was (super) short notice, but I was able to gather enough things to be in my very first craft fair last weekend :)

My little setup for the day!


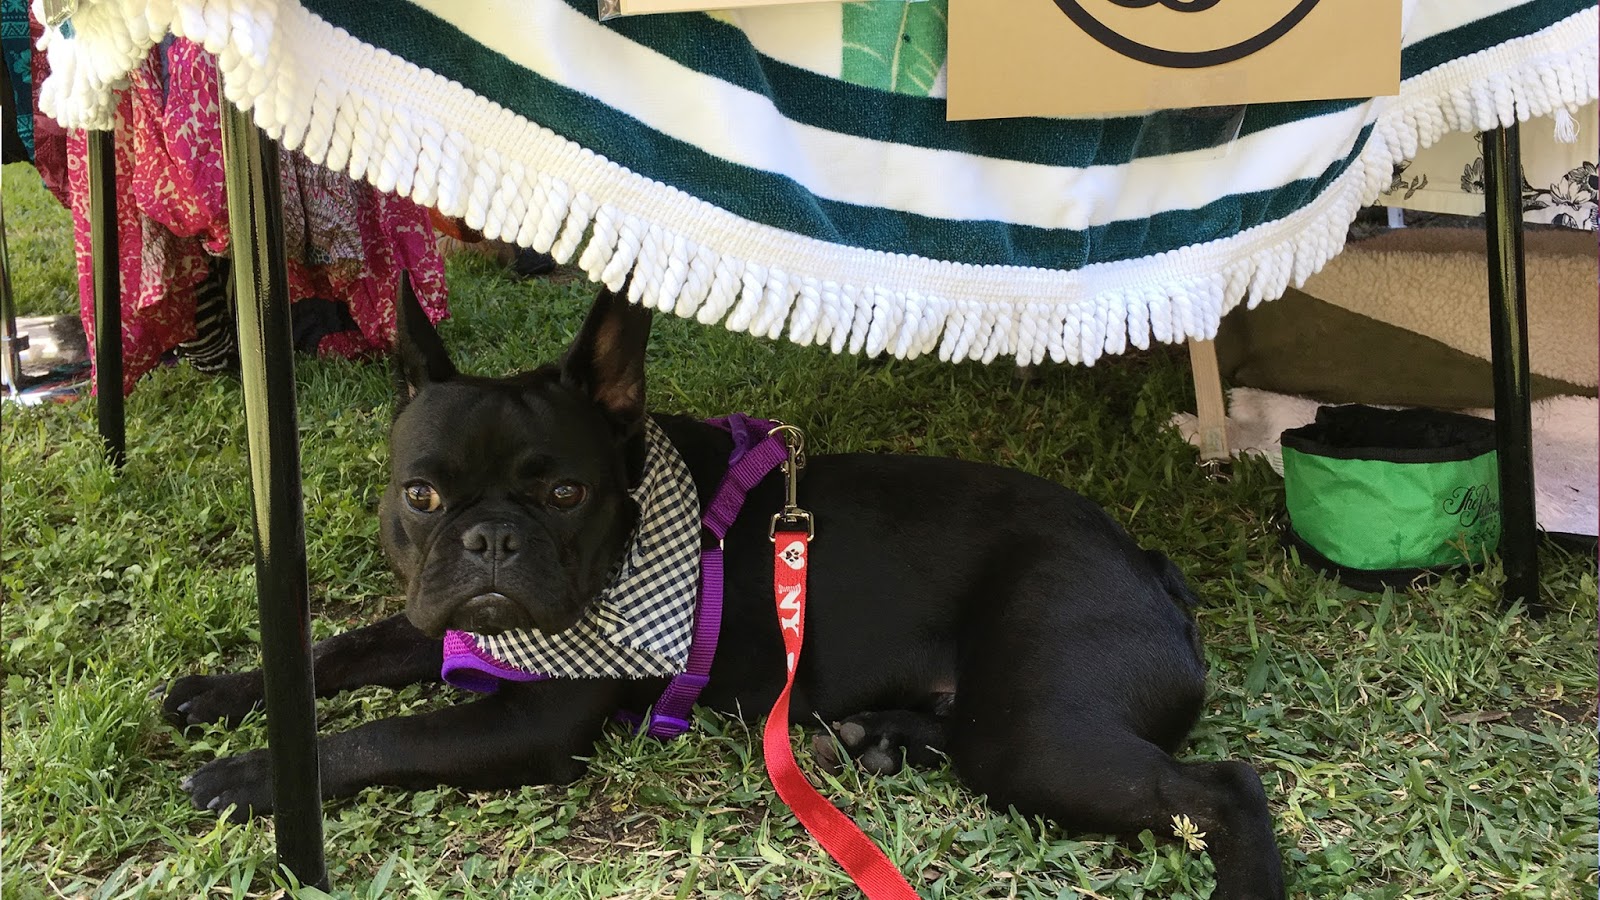
I had my little helper out there with me to lure in customers. He pretty much got all the attention.

I made little gift sets of all my die cuts and packaged up all of my stationery.

Remember my Shrinky Dink bouquet necklaces? I used my necklace stand to display them.

With all the excitement I forgot to get a picture of myself with everything!

 I love these little wax seals so much, all handmade by me :)


So many bags of tiny confetti!


I almost thought I might not have enough prints... Until I gathered them all and had a mountain.


We had so much fun in the sun. Happy Easter from me and Pickles!

Thursday, March 24, 2016

How to use Silhouette Monogram Files to make your own!

The question I probably get asked the most is how to modify my monogram files. So here is an in depth tutorial on how to do that!
When you buy my monogram files, usually they look something like this:

When you buy that design, the letters are separate and are not included, they can be found here:
https://www.silhouettedesignstore.com/view-shape/81519
https://www.silhouettedesignstore.com/view-shape/81522
https://www.silhouettedesignstore.com/view-shape/81525
https://www.silhouettedesignstore.com/view-shape/81528


From there you can copy and paste the letters you need into the monogram file you bought, using this method:

First, open your monogram file with the letters that you want to use. If you want different letters then you would have a couple more to open.


If everything is all grouped together like it is here, click directly on the image to select it.


 If there are a ton of parts and it's confusing, select all is a good way to get everything.


Go to Object- Ungroup


Now everything should look a little like this, you can see all the different pieces.

 
 You might select a layer to grab one piece, only to find it is still stuck together-


Simply ungroup it again,


 Click ungroup again. If you ever want to undo anything, just hit Edit- Undo!


Now you have 3 separate letters!


Time for the fun part. Go to Edit- Copy, once you have clicked on the letter you want,


go to your original blank document that is there whenever you open Silhouette studio, and go to Edit- Paste.


Tra La!


Now go to your other documents and do the same steps with the other letters you want.


If they are different sizes like they are here, simply click one corner and hold shift while you drag it out. Holding shift will make sure it stays the right dimensions.


Now to add your frame! For simplicity's sake I used one of the frames from the same file, but you can go crazy at this point and use whatever you want! Copy your frame from your other document,


and paste and drag it to your desired location.


It's that simple! Hope that helps some of you and have fun! :)
xoxo
-Sophie


Tuesday, October 27, 2015

Totally addicted to Mint!

The newest awesome toy from Silhouette is finally in my hands! This little thing could almost be mistaken for an Apple TV, it's so small. It's the Mint!
I had the pleasure of seeing this baby in action at the Silhouette Summit that I attended, and I was already in love. 
When the package arrived I was a little intimidated at first but just couldn't wait to try this thing out, and an hour later I already had a stamp made! I am super excited about this machine because this means that we are so much closer to having a BIG thermal imaging printer for stencil making and whatever else you can think of! All of this technology touches on the same idea that GOCCO machines use, using heat to burn an image into thermal media. So in essence, this little contraption could be a future self contained screen printing machine. (fingers crossed)

Anyway, I wanted to make something fast, for the holidays and personalized. So I threw together this little stamp that I will use on my Christmas gifts:
And loaded up my new Mint software, which was surprisingly painless, as was the entire stamp making process! Its was so ridiculously easy, here were the steps:
1. Open your design
2. Choose stamp size
3. Center image
4. Choose filter (if needed, I think you might only really need these if you're trying to use a photo)
5. Click "Start Mint" ***Before putting in stamp***
6. Put in stamp cartridge 
TRA-LA! Thats all there is to it, the entire process took about 10 minutes, on my first try! Here are the results: 
Here is the stamp fresh out of the Mint and mounted on its block:
Waiting for the ink to absorb,
And stamping to get all the excess ink off. You can see the detail that this little machine can achieve, The only reason my stamp looks a little "messy" is because I added grungy textures to it so it wouldn't be too perfect.
Look how cute it is on my little Gift Card Bag!
I can't wait to make more stamps, my head is already filled with ideas! The possibilities are endless, you can use photos, which is something that the Silhouette definitely cannot do. It opens up so many more ways for you to personalize something, and FAST. I highly recommend grabbing one of these,  especially if you already an avid Silhouette-er. Has anyone else had success stories with this little toy yet? I would love to see what others come up with. :) Happy stamping! 
xoxo

Monday, July 27, 2015

So many new designs!

There are lots of fun new items up in my store today, check them out! :)


xoxo
-Soph

Thursday, July 2, 2015

Perfect Gold Foil! Minc Vs. Laminator

If you know me, you'll know that I can be a little obsessive. I have been wanting to start foiling for a while now and I was torn about whether or not I should buy Heidi Swapp's Minc machine, or go with a "cheaper" lamination machine, which supposedly works just as well. After lots of video watching I decided to try to save some money.
I am already used to messing around with toner from working with my Gocco. I think people should know that it's not exactly easy to just find a copier that uses toner these days. I know that my local copy place does not use toner anymore, just FYI. For me buying a laser printer is a no brainer because I will be using it for multiple things. I actually had an old one is storage but the ink is no longer made, so I decided to upgrade to a Brother laser printer.
I started out ordering a Swingline laminator, and the results were not great. Anything that is worth showing for this test was laminated after I let the thing heat up for at least an hour. It still definitely worked, I just wanted it to be perfect, the black spots sticking out really bugged me. 
Why aren't you solid???
It seemed like there was a lot of room for error, and I couldn't help obsessing over pinterest pictures where the gold foil was perfect. Running it through the laminator 3-4 times, waiting that long for it to heat up all for mediocre results just wasn't good enough, and it looked like all laminators pretty much worked the same, unless they were expensive. After watching lots of Youtube videos, I decided to run out and buy a Minc machine, and after seeing that there were a couple at my local Joanns. And guess what, it was on clearance for $89.99!
Since the Minc came with some sample foil, I was able to test my results with both the Minc foil, and the art deco foil. Overall I think both foils are pretty much the same in terms of quality. It seems like the red has better coverage than the blue for some reason, the red was able to adhere much more while the blue had a good amount of problems.
Using the Swingline, after letting it heat up for an hour.
 The red looks all right, but...
The trouble with the blue really stood out for me.
 They're still cute, just not perfect.
 Another using Kraft paper and the Laminator. I just can't stand the spots. 

And here is the first attempt with the Minc! Not bad fpr a first try.
 Results with Minc, same foil and paper.
Still one tiny flaw, not sure why, but looks way smoother! This was on setting 3, I think if you're using card stock, just go ahead and go up to 5.
After only spending 10 minutes with the Minc, it was clear who the winner was. The Minc had results that were infinitely superior to what the laminator could do. I tried making a few pages for my planner (planner accessories coming soon!), and wanted to try a bunch of different papers besides plain white. I was most excited to try to foil kraft paper, in my head it looked so neat.
Success!! It came out perfectly, with minimal effort! No waiting for it to heat up for hours, no sending it through multiple times.
 Look how pretty the red is!
 From my coral collection :)
So pretty!
I am just amazed at how different the results are from the laminator, the pictures really don't do it justice.
Considering the Laminator was around $30 (which is getting returned), I feel like the Minc is worth the extra money. The time and foil that will be saved from eliminating errors with the Minc is definitely worth it, especially if you want to make high volumes of prints, like I want to do. It was also nice that some foil came with the Minc so that I could test it out without buying more products.

Tips/Verdict:

Use the smoothest paper you can find
Make sure your settings on your printer output the most toner possible (highest dpi/quality)
Minc: Worth it
"Cheap" Laminator: Worth it if you're not a perfectionist
Art Deco Foil: just as good as Heidi Swapp foil
Minc Foil: Wonderful!

Here is my list of materials:
White Paper
Kraft paper (on sale for super cheap at Michaels right now):

Black paper
Deco Foil 
and the winner: MINC
If you want to make any of my posters with foil, you can buy them from my shop in high resolution:
Peacock Feather Poster
 My peacock Feather design came from my Silhouette store
The Wild & Free Poster 
The Coral print design was used from my coral collection here

But since I'm sure y'all would like to try this without buying MORE stuff, I'm posting my designs that I used for the coral print and the Wild & Free print, the size of the artwork is about 2 x 2', perfect for a small print, and you can get 2 on one 8.5 x 11 page.


Print them out in black, and foil them up! Have fun! Hope this helps with some decision making. :)